If you’re looking to make the creamiest, freshest paneer at home, you’ve come to the right place! Making paneer is easier than you think, and with just a few ingredients, you can have this soft, Indian cheese ready to go in your favorite curries, wraps, or snacks. Whenever I make my butter paneer recipe or coconut paneer makhani recipes, they always taste even better when I make my paneer from scratch!
This website uses affiliate links which may earn commission for purchases made at no additional cost to you.

Table of contents

Key Ingredients (And Why They Matter)
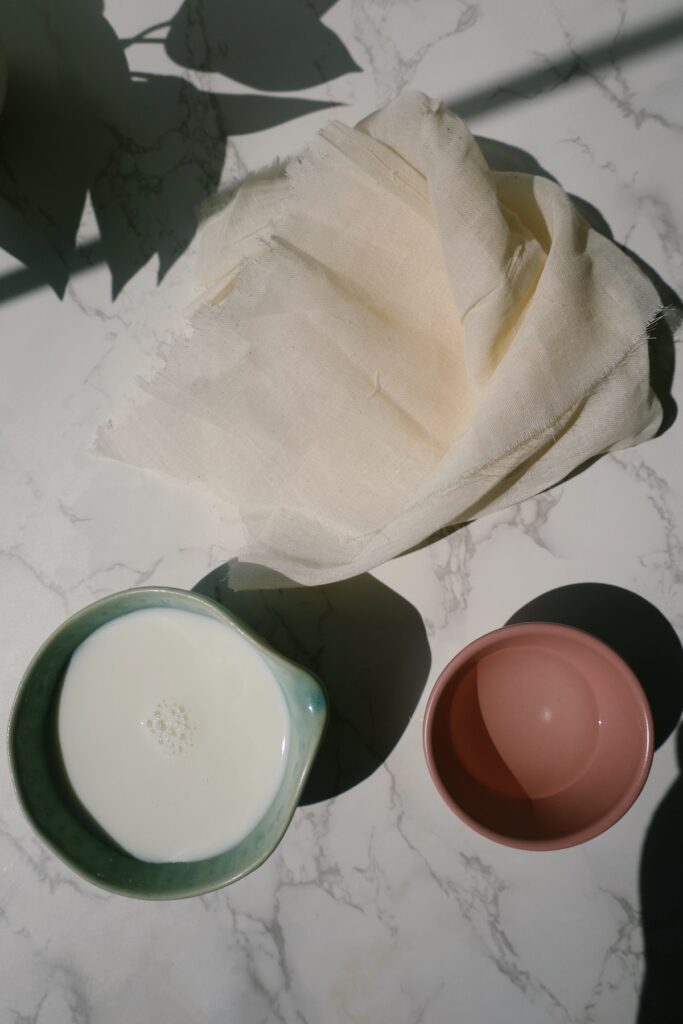
- Whole Milk: The star of the show! Whole milk is essential because the higher fat content gives you that rich, creamy, luscious paneer we all dream about. Avoid skim or low-fat milk—they just don’t cut it here.
- White Vinegar: A mild acid like white vinegar helps the milk curdle perfectly without leaving a strong flavor behind. It gently separates the curds from the whey, setting you up for paneer success.
- Cheesecloth (Tool): Okay, not an ingredient, but super important! You’ll need a clean cheesecloth or a thin kitchen towel to drain and press the curds. It’s what helps form that beautiful block of paneer and squeeze out all the extra whey.
How to Make Paneer At Home!
- Heat the Milk: In a large pot, bring 5 cups of whole milk to a simmer over medium heat. Stir occasionally to avoid burning.
- Add the Vinegar: Once the milk is simmering, add 1-2 tablespoons of white vinegar. Stir gently and watch as the milk curdles.
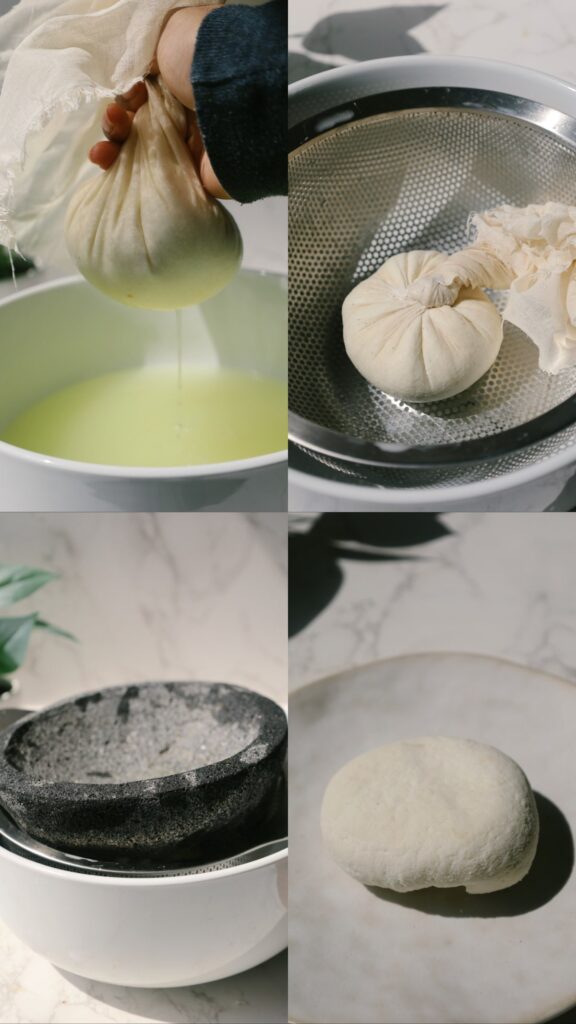
- Separate the Curds and Whey: Continue to cook for a minute until the water is clear, and the curds separate completely from the whey.

- Rinse the Curds: Place the curds in a fine sieve or your cheesecloth and rinse under cold water to remove the vinegar taste.
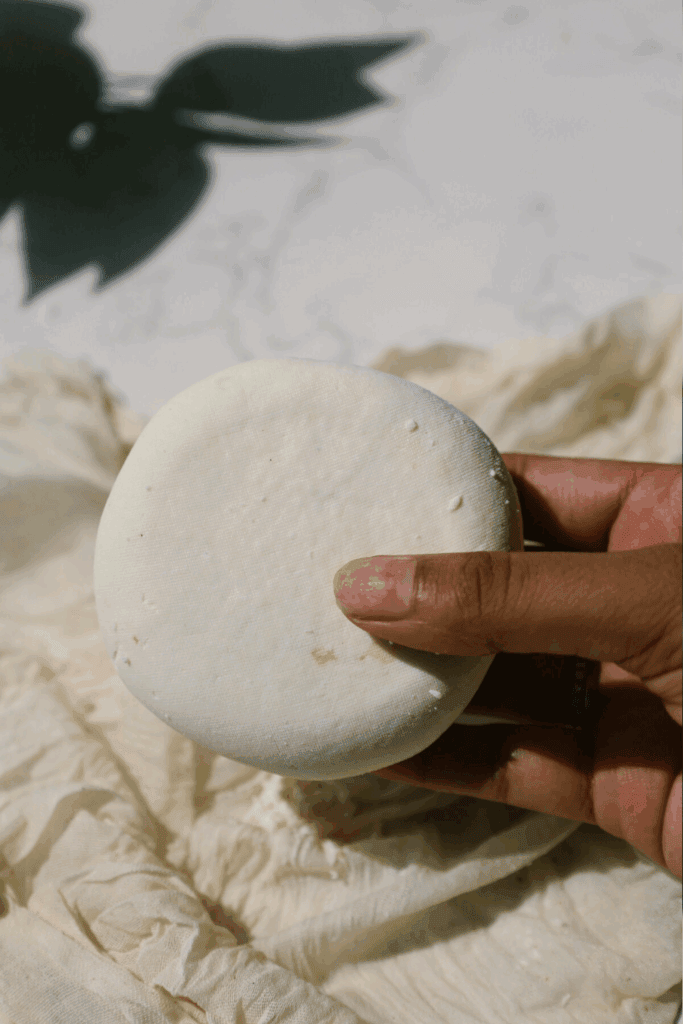
- Tie and Press: Transfer the curds to a clean cheesecloth, tie it up, and press it gently to remove excess whey. Let it sit for 1-2 hours for the perfect texture. (Or longer depending on how firm you want it!)
Expert Tips and Tricks
Use the Whey: Don’t toss the leftover whey! It’s packed with nutrients and can be used in soups, smoothies, or even to knead dough for roti.
Temperature Matters: Be patient while heating the milk. If you heat it too quickly or let it boil over, you might not get the perfect curd separation.
Vinegar Ratio: Start with 1 tablespoon of vinegar and add a bit more if the curds don’t separate fully. Too much vinegar can make the paneer grainy, so go slow!
Press it: For a softer paneer, press it lightly and let it sit for a shorter time. For a firmer, sliceable paneer, increase the pressing time to 1 hour or more.
Serving Suggestions for Homemade Paneer
Now that you’ve got a beautiful block of homemade paneer, the real fun begins — eating it! Here are some delicious ideas to put that fresh, creamy paneer to work:
- Butter Paneer: Soft cubes of paneer swimming in a rich, buttery tomato sauce? Say less.
- Chilli Paneer: Feeling something a little spicy and street-food inspired? Try this recipe – it’s crispy, saucy, and packed with flavor.
- Paneer Tikka: Grill it up! Marinate your paneer cubes in yogurt and spices, then grill or bake them for the ultimate appetizer.
- Paneer Tikka Roll or Sandwiches: Cube your paneer, toss it with spices, and stuff it into wraps, naan, or sandwiches for a high-protein lunch you’ll actually look forward to.
FAQ
Yes! In fact, they taste even better the next day since the veggies and noodles have time to marinate in the delicious sauce.
Up to 3-4 days in an airtight container.
How to Make Paneer (Easy Version!)
Ingredients
- 5 cups whole milk
- 1-2 tbsp white vinegar
Instructions
- Heat the Milk: Begin by placing 5 cups of whole milk in a large pot. Set it over medium heat, allowing the milk to come to a gentle simmer while stirring occasionally. This prevents it from sticking to the bottom and burning.
- Add the Vinegar: Once the milk has simmered and you see small bubbles around the edges, it’s time to add the vinegar. Pour in 1-2 tablespoons of white vinegar, stirring gently. Almost immediately, the milk will begin to separate into curds and whey. You'll see the milk solids forming, which means you’re on the right track!
- Separate the Curds and Whey: Allow the mixture to cook for another minute until the whey becomes clear, and the curds have fully separated. This is the perfect moment to stop cooking.
- Rinse the Curds: Now that you have your curds, place them in a fine sieve under cold running water. This will rinse off any residual vinegar flavor and help cool the curds down, making them easier to handle.
- Tie and Press: Once rinsed, transfer the curds onto a clean piece of cheesecloth. Gather up the corners, tie them, and press gently to remove excess whey. For a firmer paneer, you can place a heavy object on top for about 30 minutes. The longer you press, the firmer the paneer will be.
Notes
Nutrition
Nutrition information is automatically calculated, so should only be used as an approximation.